A truss rod is like your guitar’s spine, except it’s way easier to adjust than an actual spine (and won’t require a chiropractor). Its job? Keeping your neck straight. It’s a simple concept: an adjustable steel rod running through the middle of your guitar’s neck, allowing you to add or remove relief — which is a fancy way of saying “adjusting the amount of bow in your neck”.
Despite how important it is, the truss rod is often misunderstood in the world of guitar setup. Ever gone down the rabbit hole of trying to lower your action by tweaking bridge height and string saddles only to make things worse? Odds are, all you really needed was a simple truss rod adjustment. And here’s how to do it (properly)!
What Is a Truss Rod and How Does It Work?
A truss rod is a steel rod built into the center of your guitar’s neck that can bend when you add or remove tension. It reinforces the neck providing stability, strength, and rigidity. The truss rod works by either tightening (reducing relief) or loosening (adding relief).
- Single-action truss rods adjust in one direction, correcting a forward bow.
- Dual-action truss rods adjust in both directions, allowing you to correct both forward and backward bows.
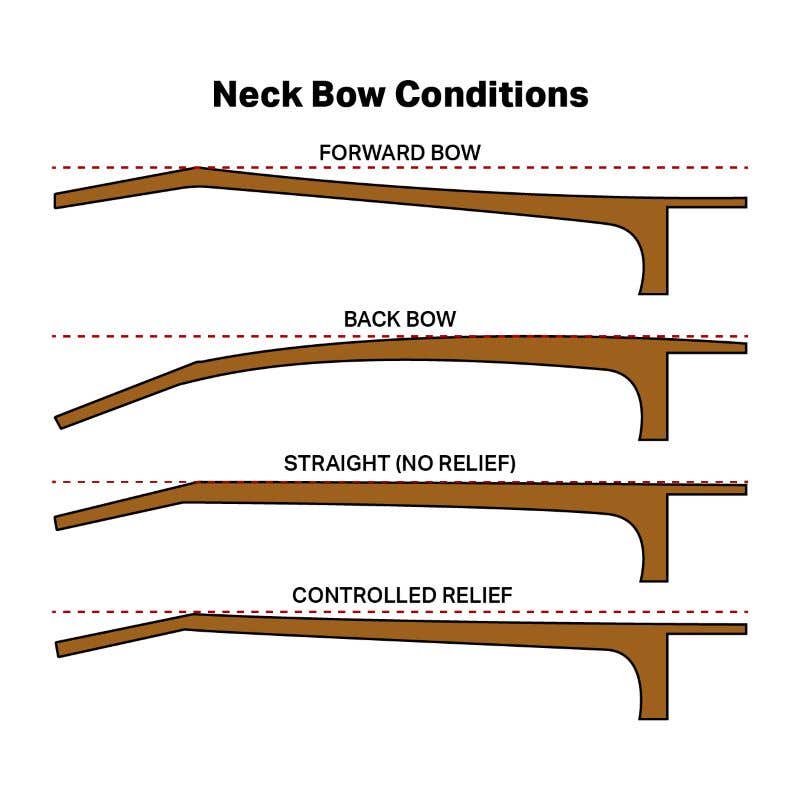
The bow of your guitar’s neck affects the playability. Too much forward bow, and your fingers will start bleeding because of the ridiculous string height. A back bow will cause frets to buzz or make the guitar unplayable altogether. The goal is either a completely straight or (more common) a slight forward bow to keep string action nice and low and no fret buzz.
Truss rods are found in just about every modern guitar and bass, whether it be electric or acoustic. Classical guitars are an exception. Because they use nylon strings and don’t carry the same string tension as a steel-string guitar, they typically don’t need the extra reinforcement. You also won’t find truss rods in other low-tension instruments, like banjos, ukuleles, and mandolins.
Tools You Need for a Truss Rod Adjustment
You’d think after decades of guitar manufacturing companies would have joined forces and standardized truss rods and the tools required to adjust them. You’d be wrong. In fact, not only has standardization never happened — it’s never even been attempted!
I have 17 guitars in my collection and about 17 different truss rod tools to go with them. Some use Allen keys, some require hex wrenches, some require flathead screwdrivers, and some need those weird skinny steel rods that make you question if you’re adjusting a guitar or picking a lock.
If you’re lucky, your guitar came with the right tool. If not, welcome to the scavenger hunt. Start by looking through your guitar’s documentation. If that turns up nothing, consider calling the manufacturer to get advice about where to get the correct tool.
Additional tools you may need:
- A sturdy workbench
- A screwdriver (if your truss rod cover requires removal)
- A neck rest to support the guitar
- A guitar tuner to check string tension after adjustment
And plenty of patience…
Steps to Adjust a Guitar Truss Rod (Without Breaking Anything)
Just like adjusting someone’s spine, there’s a lot that can go wrong with a truss rod adjustment. Over adjusting the truss rod can cause anything from minor fret buzz all the way to a separated fretboard or cracked neck.
That sounds scary, but a guitar truss rod adjustment is simple enough. Just be patient and gentle, and you’ll get through it with flying colors!
Step 1: Tune It Up
Adjusting your truss rod without tuning your guitar is like doing a front-end alignment on your car while the wheels are off. The first step of a guitar truss rod adjustment is to tune your guitar.
Step 2: Sight the Neck (aka The Squint Test)
Before you reach for your truss rod tool, you need to see what you’re dealing with. The easiest way? Look down the neck from either the bridge up or from the headstock down.
How to Spot a Forward Bow (Too Much Relief)
If your neck has too much relief (a forward bow), the strings will look like they’re bending over an invisible speed bump. You’ll see shadows under the strings, especially around the middle of the neck — kind of like a poorly constructed bridge sagging under its own weight.
If you have a super-high string height, this is likely the culprit.
How to Spot a Back Bow (Too Little Relief)
A back bow is trickier to spot because the neck is actually pushing against the strings, but here’s the clue: If your guitar plays fine open but buzzes like an angry hornet swarm higher up the neck, you’ve probably got a back bow.
And this, my friends, is why we segue into the Tap Test — the most foolproof method for checking relief (and, conveniently, my personal favorite).
Step 3: The Tap Test (The Method I Recommend You “Tap” Into)
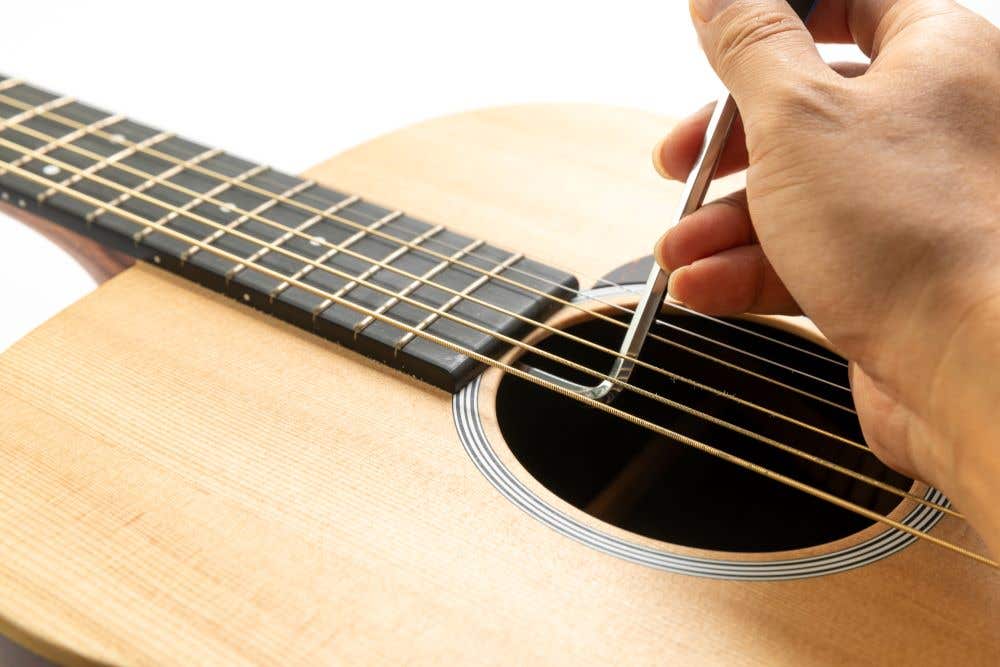
This method uses the guitar string as a straight reference line against the neck. Press the low E string down at the 1st fret and at the fret where the neck meets the body (this is important because pressing at the last fret doesn’t give as accurate a result). Make sure your fingers are on the frets, not between them.
Now, with your playing hand’s pinky, tap the low E string anywhere between the two fretted positions and watch for movement around the 8th fret.
- If the string bounces more than about .010 of an inch (roughly the thickness of a standard 10-gauge guitar string): you have a forward bow (too much relief)
- If the string is lying flat against the fret with no movement: You have back bow (not enough relief).
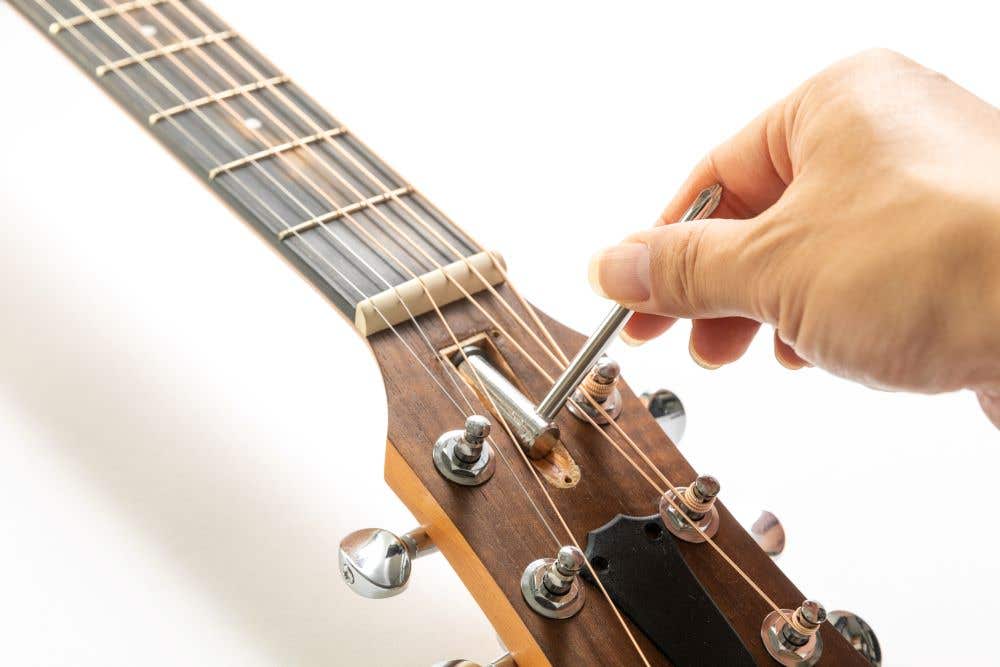
Step 4: Turning the Truss Rod (aka Which Way is Tight?)
Once you’ve determined whether you have a forward bow or back bow, grab the correct truss rod tool and make a small adjustment. Truss rods conveniently follow the “righty tighty, lefty loosey” rule:
- Turn right (clockwise) to reduce relief (tighten the rod, straighten the neck).
- Turn left (counterclockwise) to add relief (loosen the rod, allow more bow).
Of course, “Righty tighty, Lefty Loosy” is a matter of perspective. This part confuses a lot of people, so here’s the rule I follow:
- If your truss rod adjusts at the headstock: Look down the neck toward the bridge to determine clockwise/counterclockwise orientation.
- If your truss rod adjusts at the bottom of the neck (heel-adjust): Look up the neck toward the headstock to determine clockwise/counterclockwise orientation.
Why does this matter? Because if you’re looking from the wrong perspective, you’ll think you’re turning it one way when you’re actually doing the opposite — which is a recipe for making things worse instead of better.
If you’re not sure whether you need to tighten or loosen for your truss rod adjustment, here’s how I like to think about it:
- Forward bow (too much relief): Your guitar’s neck is lazy, like it hasn’t worked out in months. It needs to tighten up.
- Back bow (not enough relief): Your neck is under too much stress; it needs to loosen up, like that well-earned spa treatment after a hard day.
To avoid damaging your guitar, it’s important to make small adjustments at a time — about a quarter-turn at a time. Then tune up and recheck relief before adjusting further.
And as if we didn’t say it enough: Be patient. Some guitar necks can be stubborn and take time to move. Sometimes it can help to allow your guitar to sit for an extended period before determining if you’ve got the right amount of relief.
Step 5: Retune and Play Every Fret
Between each adjustment, always retune and give the neck a thorough go-over. Press down on every fret for every string and give it a strum to make sure there’s no buzz.
Dual action truss rods require very little truss rod movement to make a significant difference in relief. You will want to make sure you didn’t overdo it, one way or the other.
Important Tips to Remember During a Truss Rod Adjustment
A truss rod adjustment can make a big impact on your guitar’s playability, but it’s kind of like working with glue in middle school: a little dab will do ya! It doesn’t take much to overcorrect, so here are a few helpful tips to keep in mind during your truss rod adjustment.
Take your time
If your guitar still isn’t playing the way you like it, you can always adjust it again — unless you break it. So take your time and make sure your setup is where you like it.
Don’t Overcorrect
Quarter turns, not full rotations. You’re adjusting a truss rod, not opening a jar of pickles.
Retune Regularly
Every truss rod adjustment affects string tension. If you don’t retune between each adjustment, you won’t get the perfect setup. Plus, you'd be surprised how much string tension moves your neck.
Don’t Force It
If the truss rod feels too tight, stop and bring it to a pro. Brute force is never the answer when adjusting a truss rod. If it feels like there’s something wrong, get it checked out. Don’t risk making it worse.
“Truss” Me – A Truss Rod Adjustment Makes a BIG Difference
In my opinion, the truss rod is one of the greatest guitar innovations of all time. Before truss rods, a guitar neck stayed straight only if it was built like a tank — reinforced to the hilt with little room for fine-tuning. If a neck became bowed, you had to take it to a luthier for an expensive reset or planing job (or just learn to live with a bad setup).
Now that we play with steel strings — essentially high-tension wires pulling on the neck 24/7 — the truss rod has become an indispensable part of a guitar’s setup and playability. The best part? Adjusting a truss rod is simple and straightforward. Don’t be afraid to try it! Just follow this guide, take your time, and you’ll be on your way to a perfect setup in no time.