Illustrations by Michael Telewiak
When I used to own my own shop, not a day went by without some poor soul showing up at my door with a half-restrung Floyd Rose-equipped guitar, usually with the whammy bar sticking straight up or the bridge sucked down into the body. Of course, I happily took the repair in and paid my rent. Sure, Floyd Rose systems can be daunting. But if you go slow and follow this guide, you can save some money and get the perfect setup.
Here is a step-by-step guide how to restring and set up a Floyd Rose system.
Step 1: Gather Supplies
Absolute Essentials:
Just like every job, you’re going to need some tools. Here are the absolute essentials when it comes to restringing a Floyd Rose:
- Strings the same gauge as what you are swapping
- Allen Key Wrench Set
- Wire Cutters
- Guitar Tuner
- Magazine/Popsicle stick/thin board – just something thin and rigid (you’ll see)
- Safety Glasses
- Work Mat (or towel, blanket, etc.)
- Neck Cradle
Nice-to-haves:
Since the strings will be off for a while, a string change is the perfect time to do some much-needed deep cleaning on your guitar, too. Here are some “nice to have” cleaning supplies to make your guitar sparkle with its new set of strings:
- Fretboard Cleaner/Conditioner
- Guitar Polish
- Polish Cloth
- Utility Cloth
- Soft Bristle toothbrush
- Soft detail brush
You might call them nonessential for a Floyd Rose string change, but these cleaning supplies really help your guitar last and sound its best.
Set up your work mat and neck cradle, and put on your safety glasses. The mat will prevent your guitar from getting scratched as you’re working on it, and the neck cradle supports the guitar’s neck (imagine that) so you don’t put unnecessary stress on it.
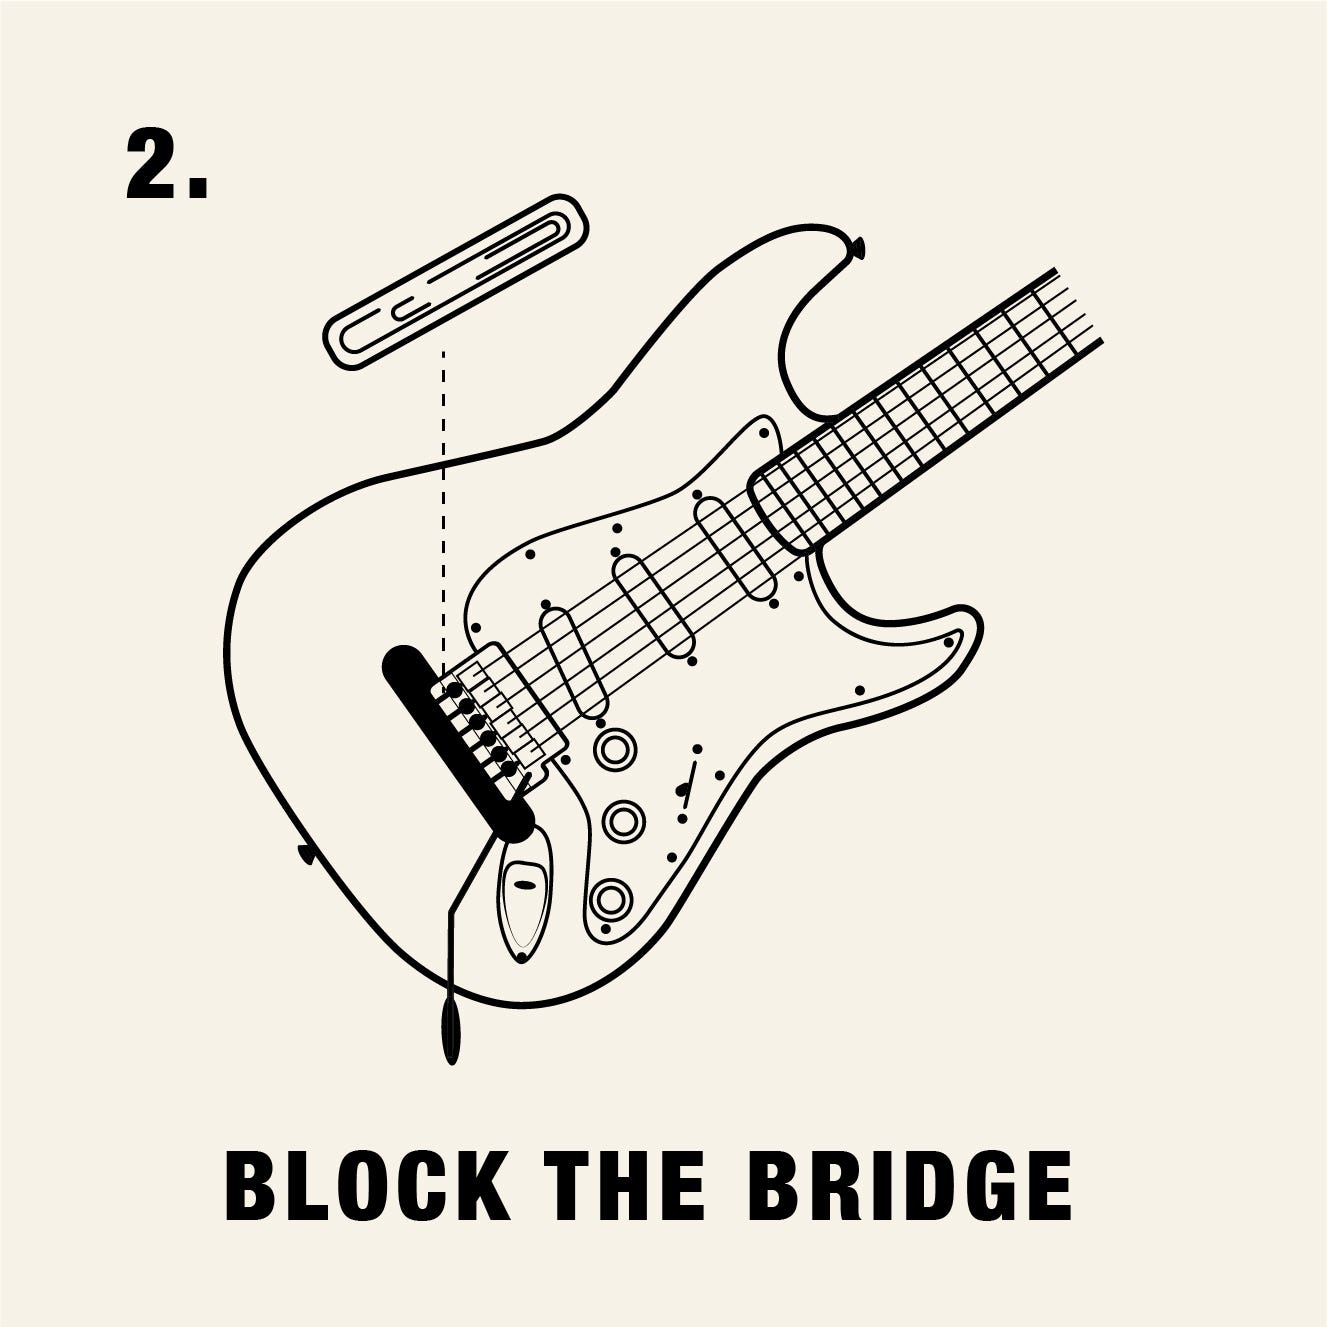
Step 2: Block the Bridge
Press the tremolo bar down a little and slide the spine of the magazine under the back of the bridge. This will gently hold the bridge in position when the tension on the strings is removed. If you skip this step, your bridge will shoot down into the body cavity from the spring tension or maybe even fall off completely. I told you it was important!
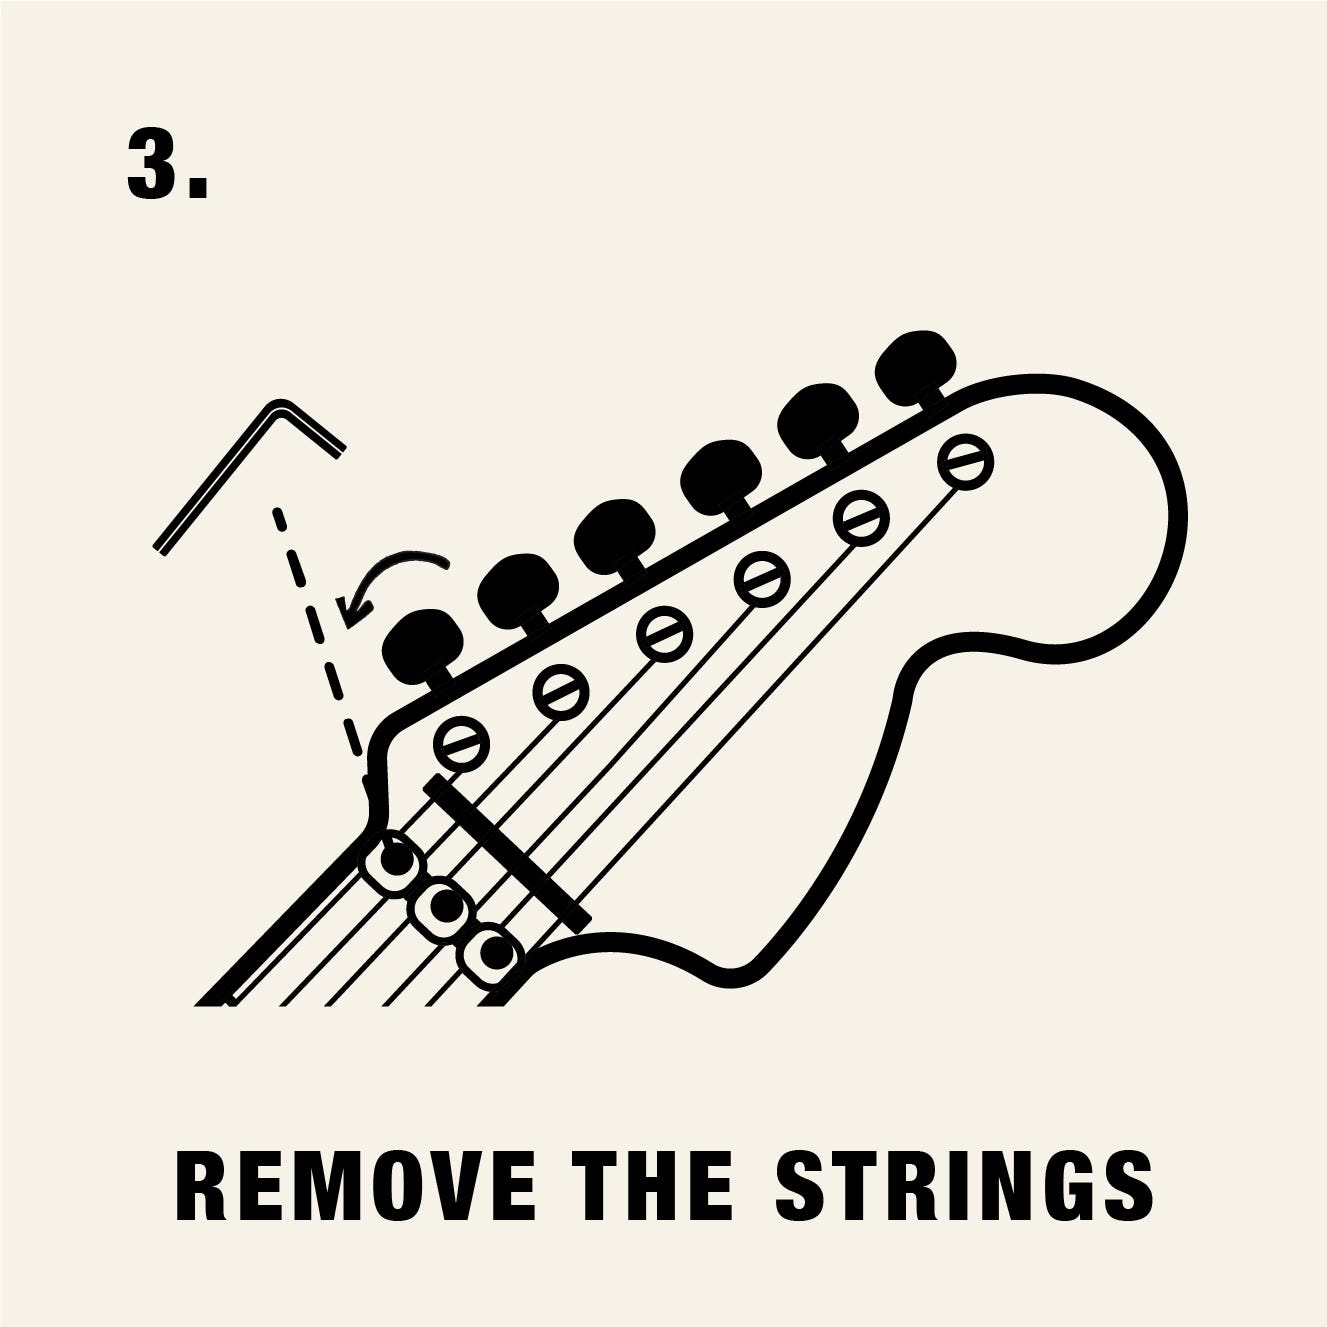
Step 3: Remove the Strings
At the headstock, unlock and remove the three nut locks using your Allen key set. Note the position and orientation of each clamp. Loosen the strings to slack. Loosen the clamps on the bridge (again with your Allen key) and remove the strings from the bridge and headstock.
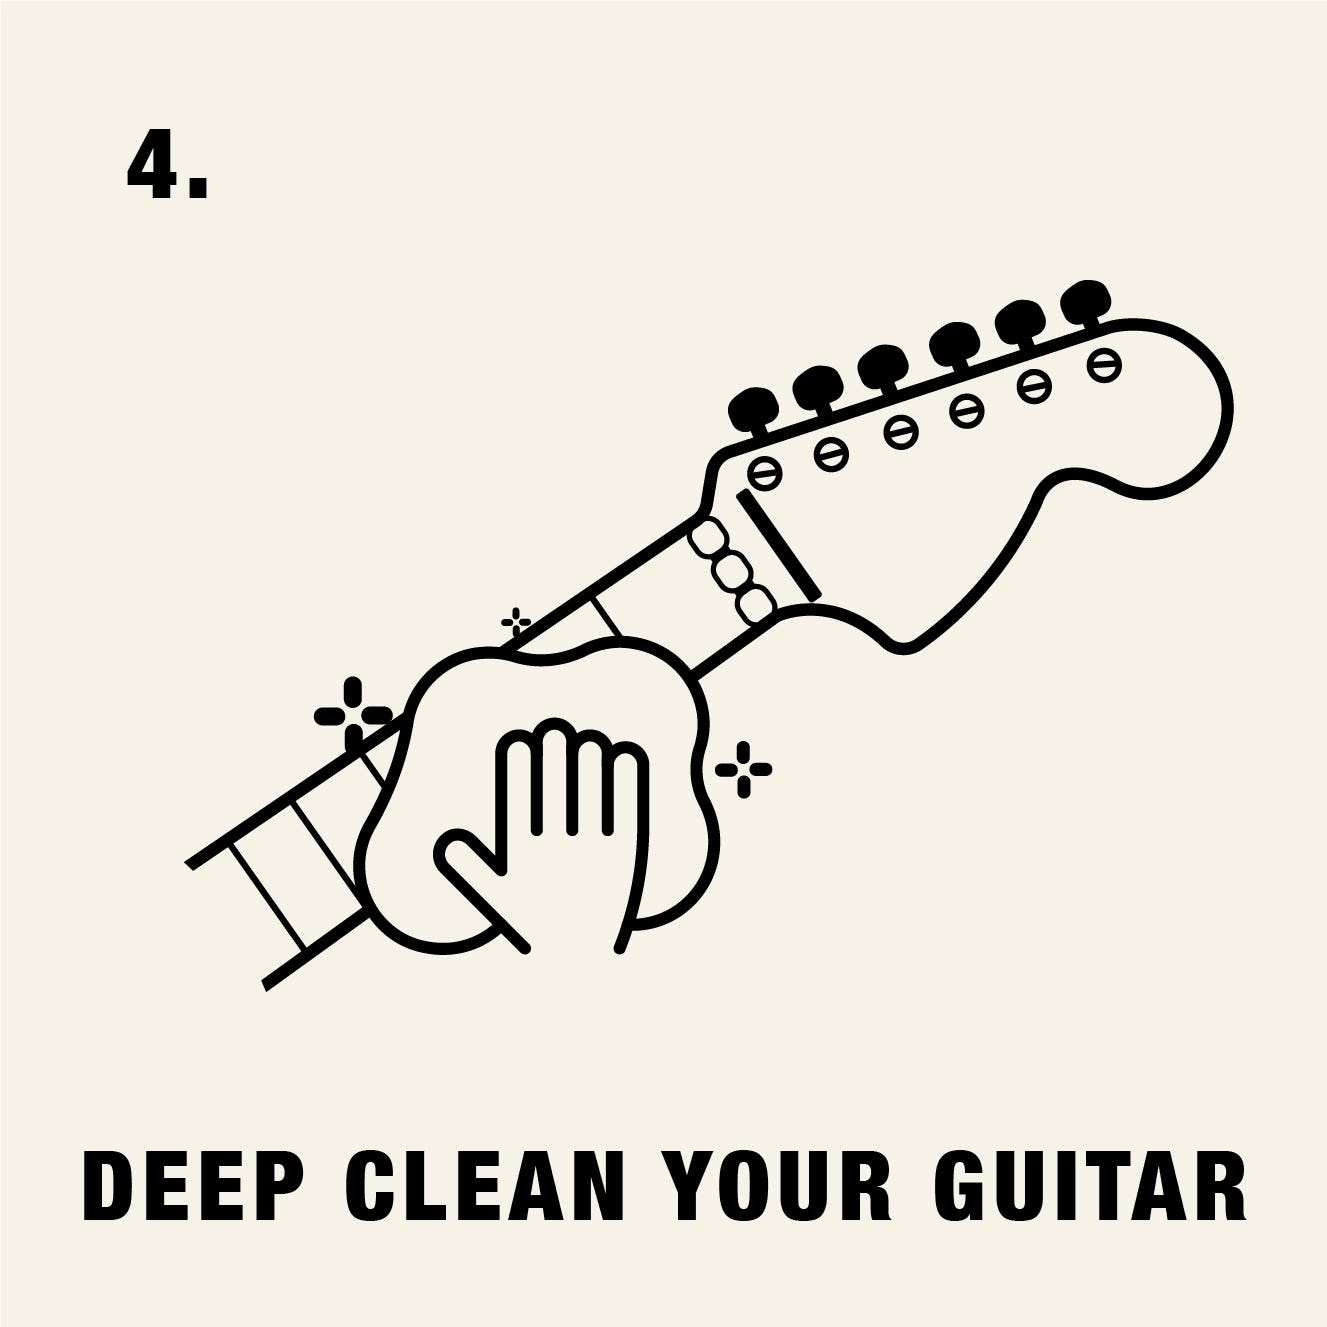
Step 4: Deep Clean Your Guitar
Your strings are off, so take advantage of the free-and-clear fretboard. Apply fretboard cleaner/conditioner to fretboard, and let it soak in.
The conditioner will float out a lot of the grime from the fretboard. But if needed, use a toothbrush to scrub around the frets.
After a few minutes, wipe down the fretboard with a utility cloth. Use the detail brush to remove any dust and crud from the bridge and pickups. Note the six metal pinion blocks sitting down in the bridge. These pieces are loose, so don’t lose them. Note the position and orientation of each block.
Polish the pickguard, face, and headstock. Then check for any loose knobs — and don’t forget to check the tightness of the output jacks.
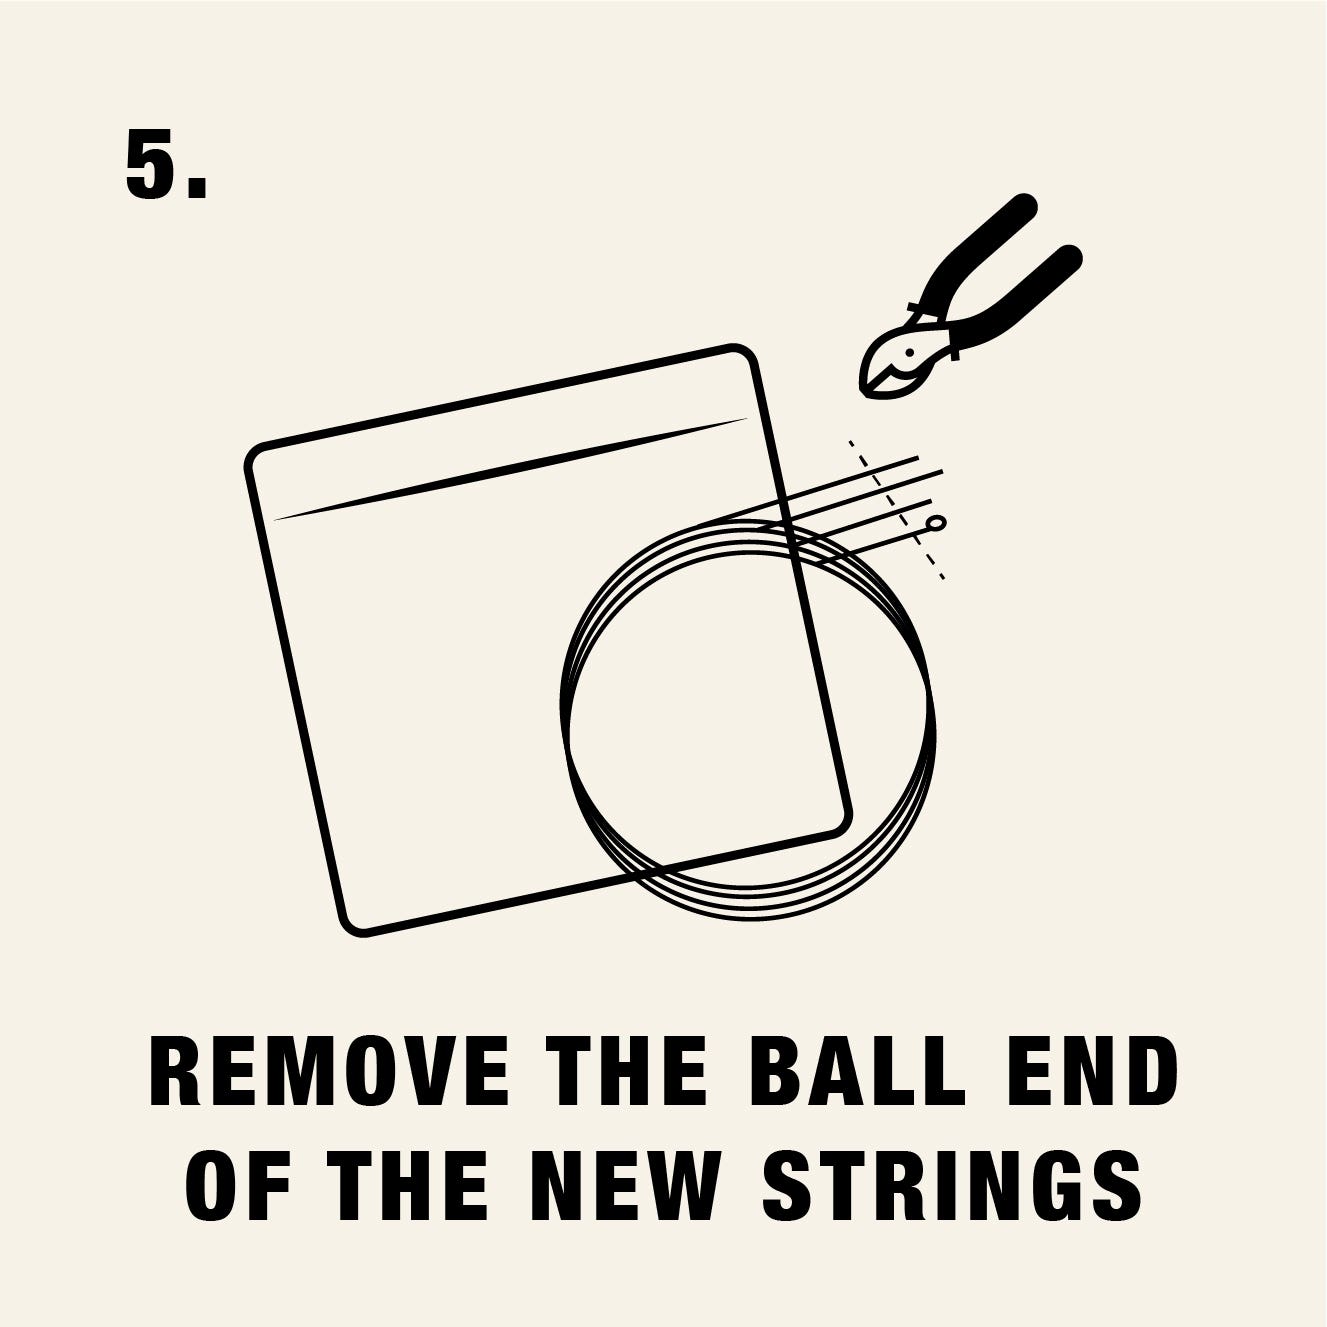
Step 5: Remove the Ball End of the New Strings
Get your new strings out and make sure you got a complete set. Cut the ball end off of each string — around an inch. Floyd Rose systems don’t need a ball end like a typical electric guitar bridge. It’s all about clamping power!

Step 6: Install Strings
Insert each string into the appropriate pinion block. Tighten the corresponding Allen screw to anchor each string to the bridge.
Note: Do not overtighten. It is possible to fracture the pinion block if you torque it hard enough.
Bring each string to its respective tuner and cut off about 1.5” past the tuner. Hold each string in tuner shaft with about ¼” peeking out the other side.
Wind the string over the cut off one time and under for the rest going downward on the tune shaft. You should get about 3-4 winds.
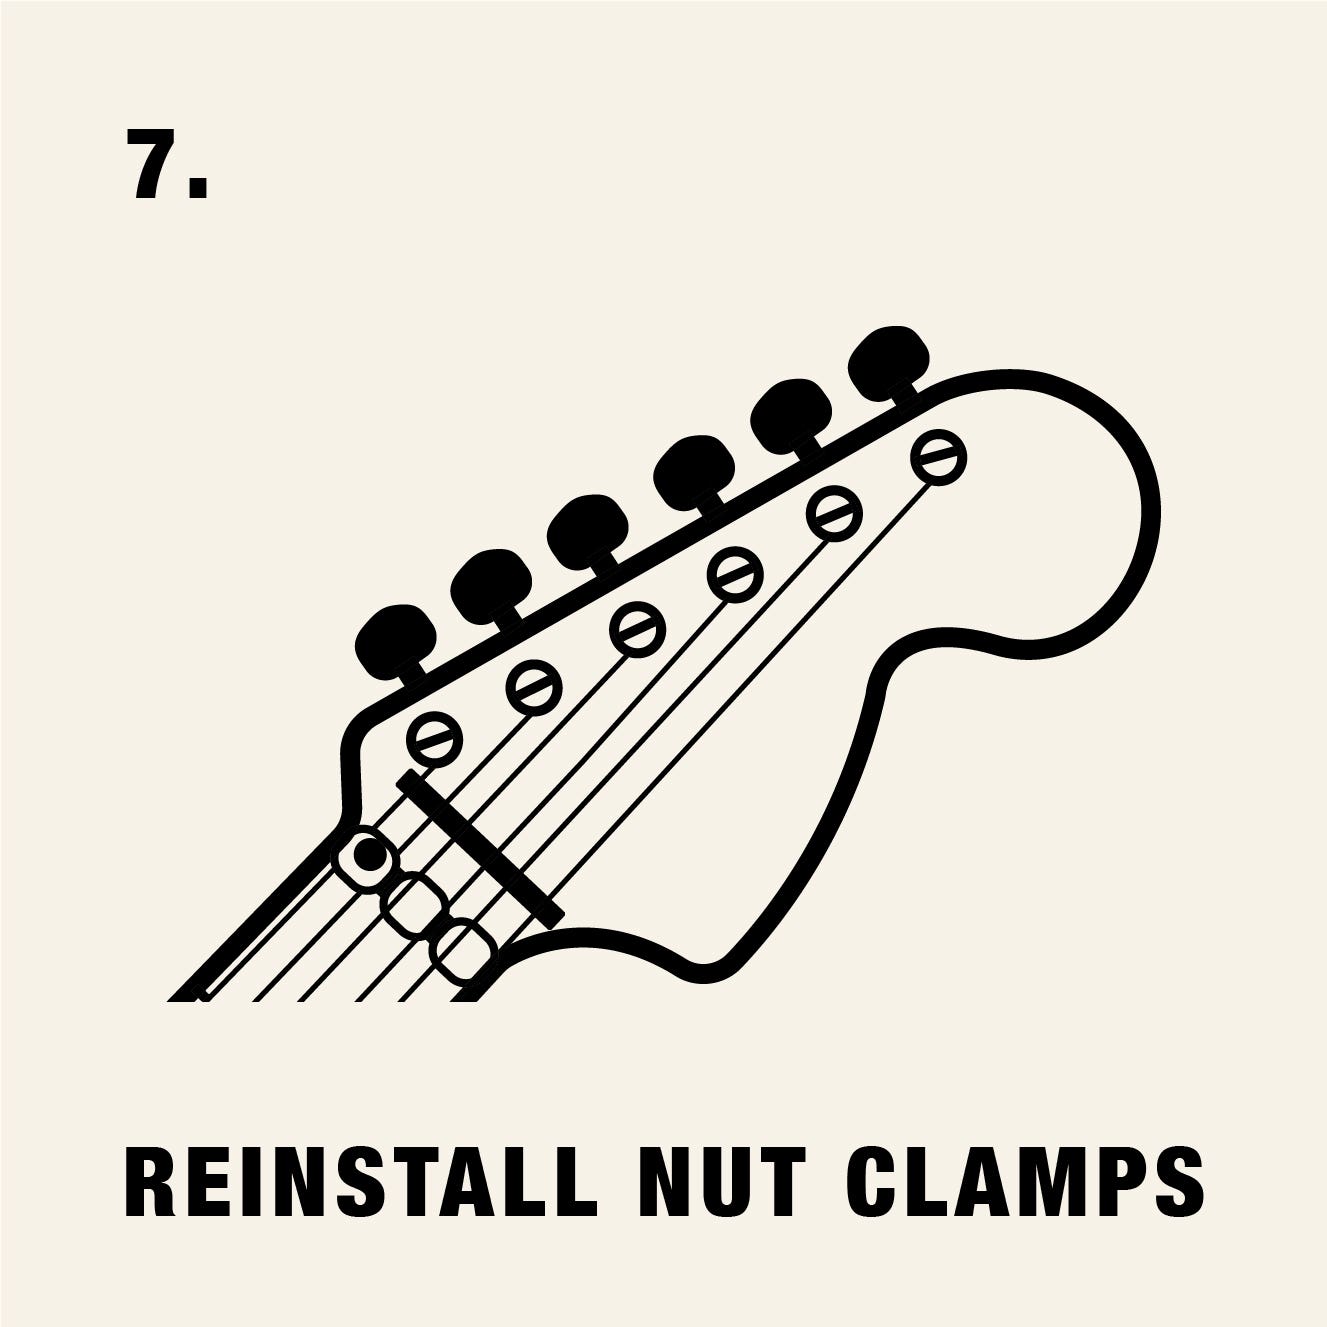
Step 7: Reinstall Nut Clamps
Re-Install the nut clamps in the correct order. Leave them loose for now.
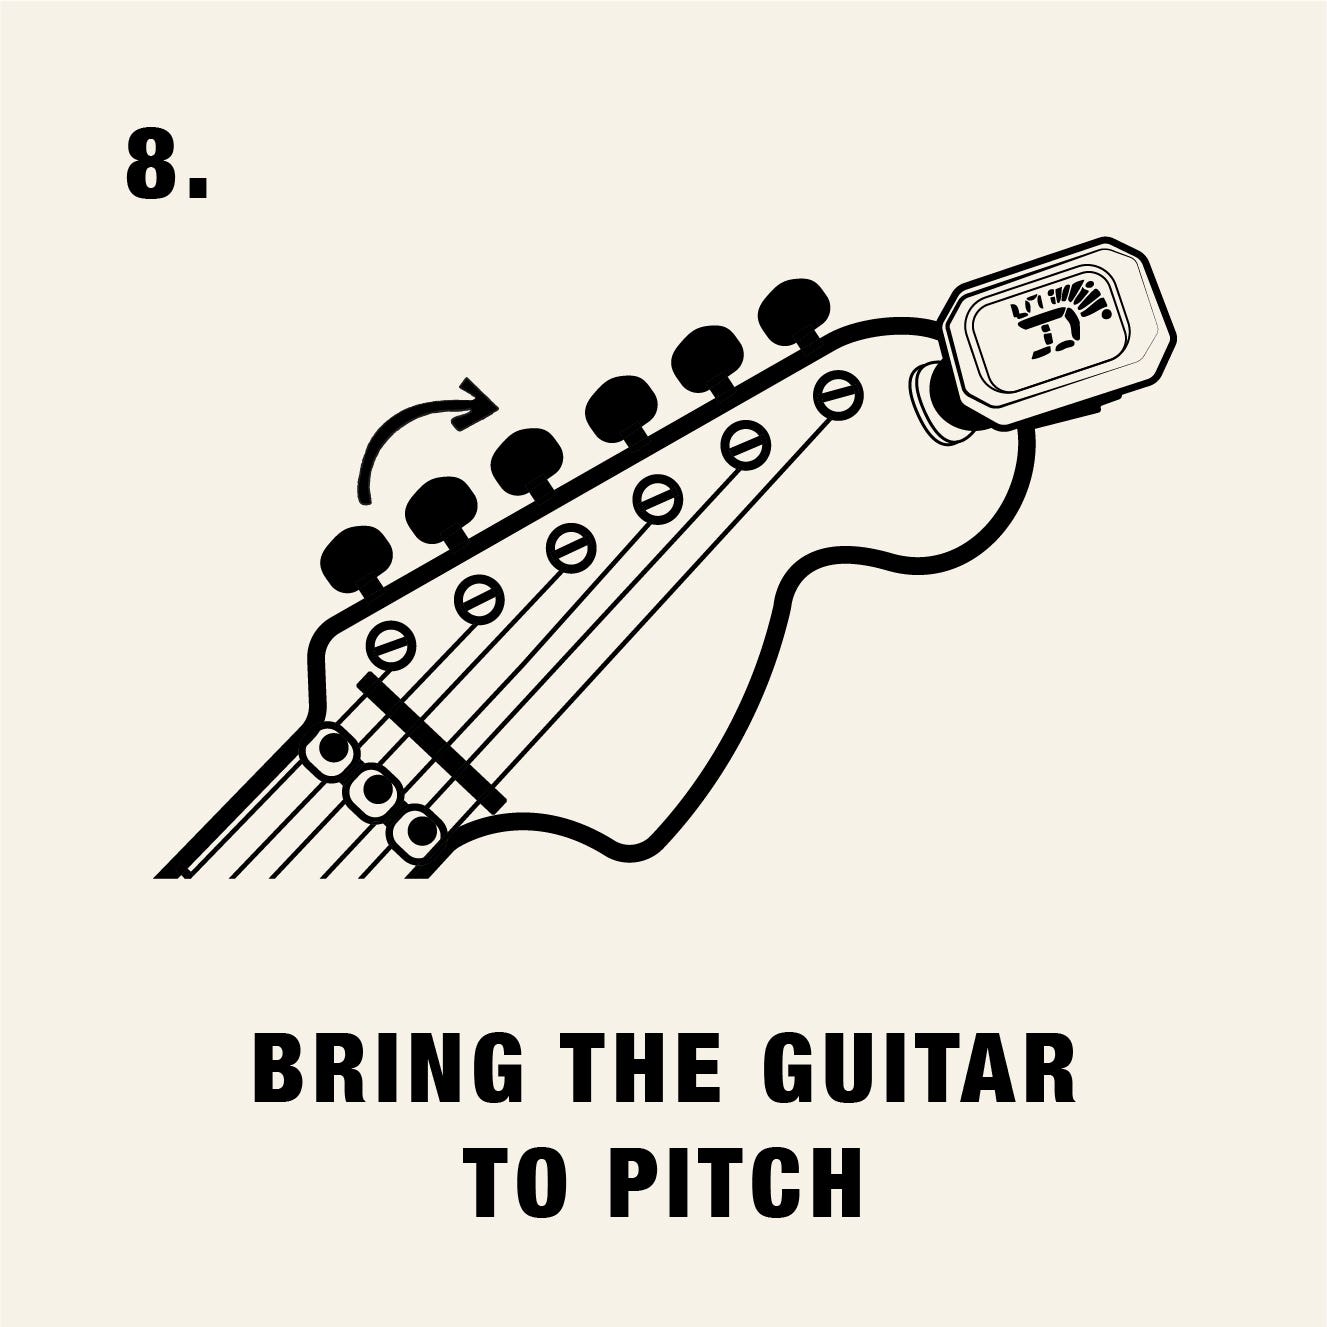
Step 8: Bring the Guitar to Pitch
Using your tuner, bring the guitar to pitch. As you raise the pitch, the magazine/board/whatever you used will start to loosen under the bridge. Remove it when most of the tension has been removed.
Each string has a fine tuner in the bridge. This is a good time to put these all at about half.

Step 9: Tighten Nut Clamps
Once the guitar is tuned up, tighten the nut clamps with your Allen key. Again, this should be firm but not torqued.

Step 10: Fine-Tune to Taste
With guitar in playing position, use the fine tuners to bring the guitar into tune. You’re now ready for all the whammys, dive bombs, tremolos, or whatever else you like to do with your Floyd Rose!
Frequently Asked Questions about Restringing a Floyd Rose
Floyd Rose bridges, as awesome as they may be, can be quite finnicky. They control a lot of things about your guitar’s playability, which can include changes in action, buzzing frets, etc. Here are some of the most common technical problems that come along with changing the strings on a Floyd Rose and what to do about them:
Q. My whammy bar is too low.
A. Loosen the claw in the spring cavity then retune.
Q. My whammy bar is too high.
A. Tighten the claw in the spring cavity and retune.
Q. Strings buzzing in the middle of the neck
A. Loosen truss rod.
Q. Strings high in the middle of the neck
A. Tighten truss rod.
Q. Strings buzzing at the top of the neck
A. Raise the bridge-mounting studs using an Allen wrench.
Q. Strings too high at end of neck
A. Lower bridge-mounting studs.
Floyd Rose Restring Recap
Floyd Rose tremolo bridges are awesome, but they certainly come with their fair share of quirks. But with a little patience and know-how, you can easily replace the strings on your Floyd Rose-equipped guitar without a costly (and embarrassing) trip to the nearest guitar shop.
And if you don’t have a Floyd Rose guitar but really want one, we have a ton of tremolo-tastic electric guitars right here at American Musical Supply. If you have any questions, contact our experts toll free at 800-458-4076. Don’t forget about our easy 0% interest payment plans and free VERY fast shipping. Now go get your dive bomb on!