Illustrations by Michael Telewiak
Your acoustic guitar sounds best with fresh strings — and don’t you always want to sound your best!? It might seem like a daunting task to restring an acoustic guitar, but it’s really a lot easier than you might think. With a little know-how (which you’ll have after reading this article) and a little patience, your acoustic guitar will get a fresh set of steel and sound as good as new. Here’s everything you’ll need to complete the mission and restring an acoustic guitar.
Why Restring Your Acoustic Guitar?
As you play your guitar, the wound strings pick up oils and bits of nail and skin. Most acoustic guitar rhythm action happens in the first four frets (the “cowboy zone”), so there will be an uneven amount of material adding mass to the strings. This eventually causes the string to behave oddly and sound out of tune and “dead”.
It can help to use string cleaner after each session. Most uncoated strings will oxidize (rust) even if the guitar is not being played. Most coated strings will unevenly wear out the coating, causing the same problems.
If it’s time (and you’ll know when it’s time), then let’s get the tools out!
Tools and Supplies Needed to Restring an Acoustic Guitar
Here is a list of all the tools and supplies you need to restring your acoustic guitar. Gather everything before you start so you won’t be rummaging around your garage with your beloved guitar on the workbench.
Absolutely Required:
- Wire cutters
- String Winder: manual or powered
- Small Phillips Head Screwdriver
- Bridge Pin Puller
- Guitar Tuner
- Neck Rest
- Work Mat (or a towel, blanket, etc.)
- Safety Glasses
Should Probably Also Have:
- Guitar Polish
- Fretboard Conditioner
- Fret polish kit
- Polish Cloth
- Soft Bristle Brush
- Replacement Battery
8 Steps to Restring an Acoustic Guitar
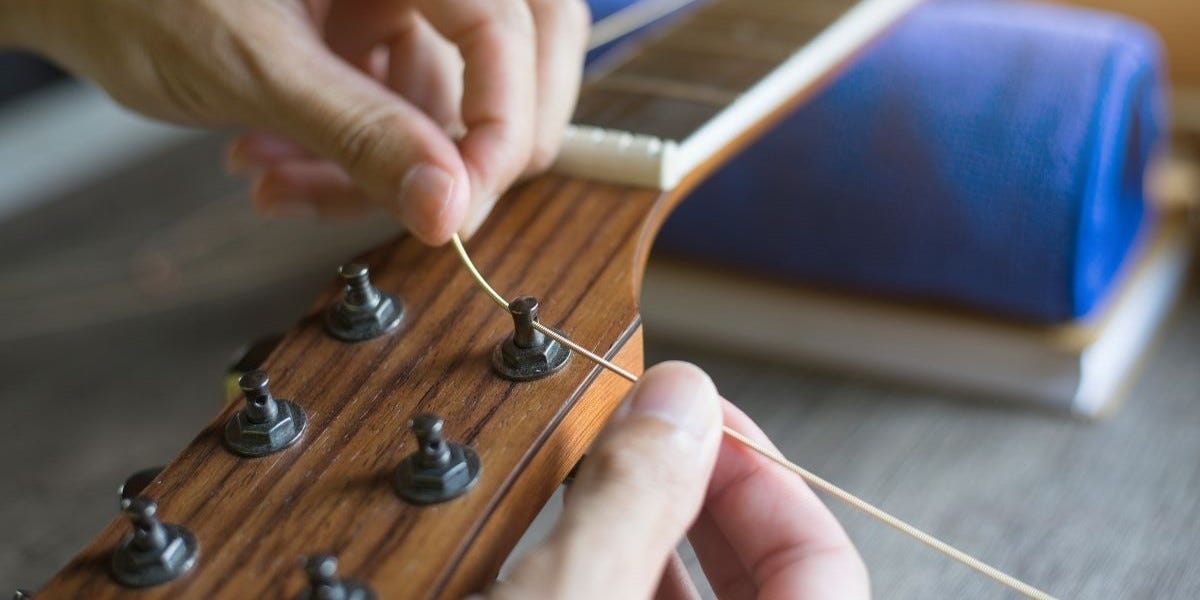
Now that you have the tools and supplies, let’s get started. As you go through the steps to restring an acoustic guitar, remember to be patient and go slowly. You don't want to hurt your guitar or break one of your brand-new strings!
Step 1 – Set up the work area
Set up your work mat and neck rest. If you don’t have a proper mat, use a towel. This will prevent you from accidentally scratching your beloved guitar during the restringing process.
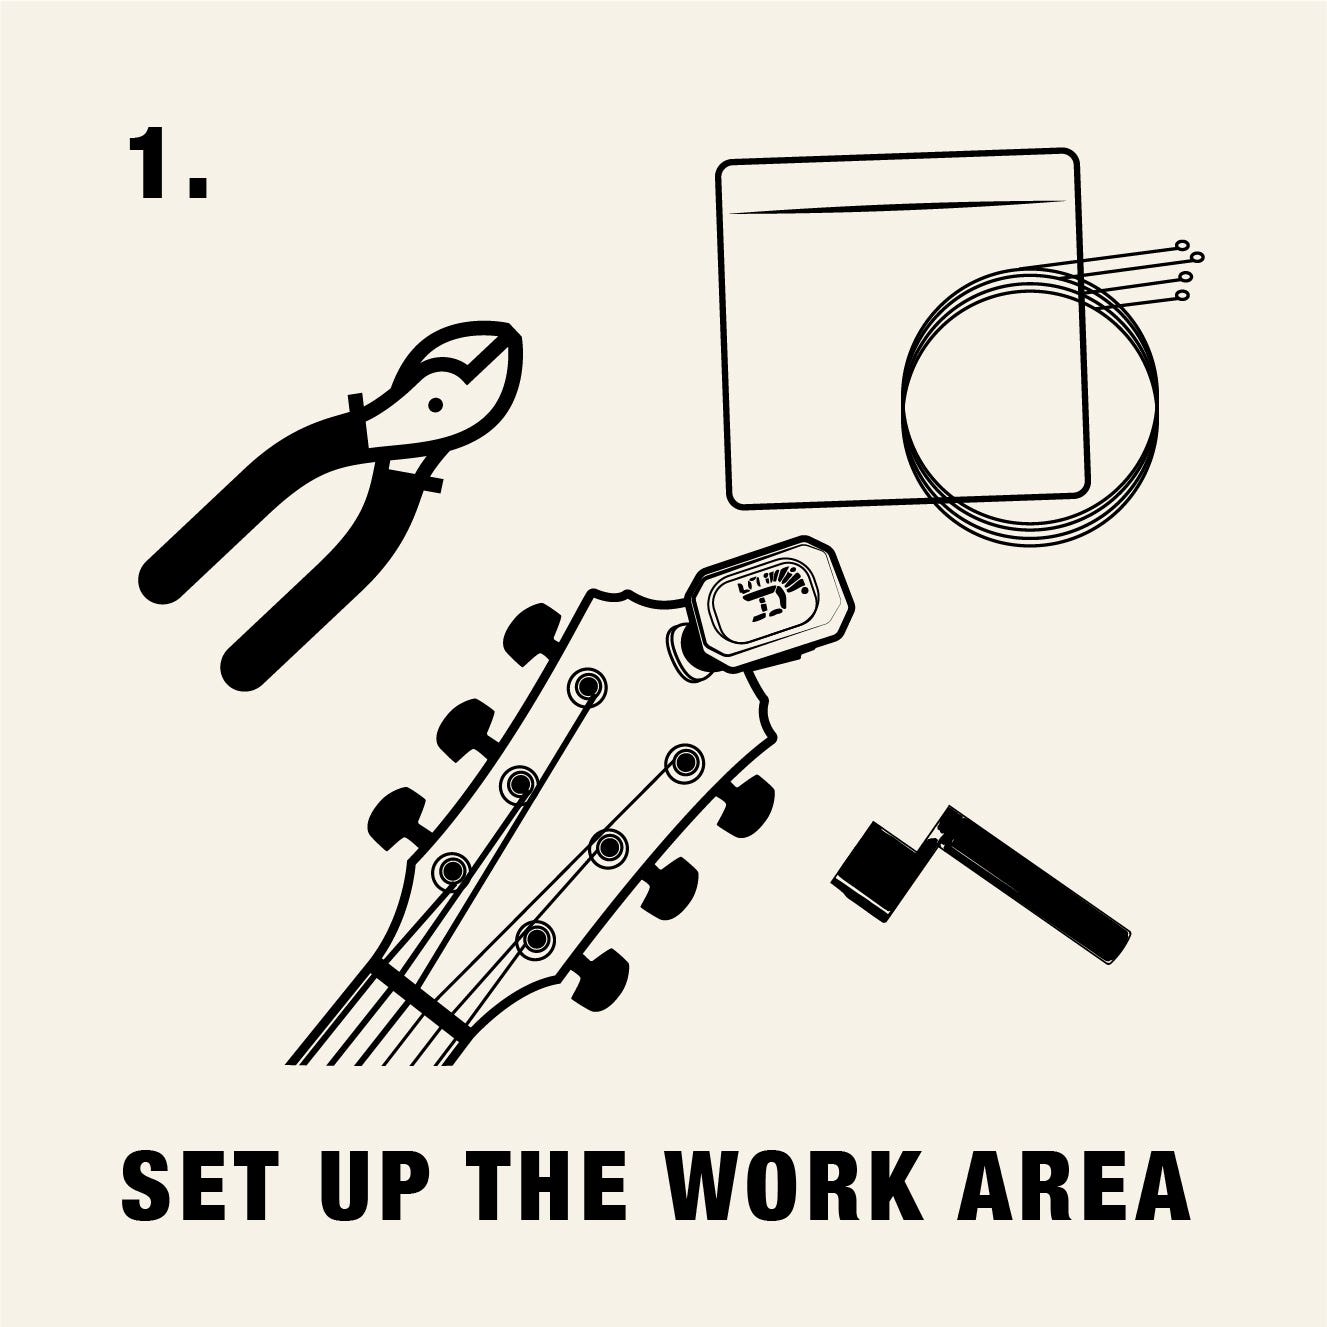
Step 2 – Loosen the strings
Safety glasses on, gently loosen the strings to slack and cut in half with wire cutters. Remove them from the headstock first. This can be a tangly mess — be careful not to scratch your headstock or poke yourself! Just to reiterate: LOOSEN THE STRINGS BEFORE YOU CUT. You don’t want to find out what happens if you don’t…

Step 3 – Remove the strings
Remove the bridge pins using your bridge pin puller if you have one. Many string winders have a puller built in. Sometimes you may need to push them out gently from the inside, be careful not to disturb any wires if you have a pickup system onboard.

Step 4 – Clean and check everything
During a string change is really the best (only) time you have full access to your fretboard and tuners, so take advantage of it!
Apply fretboard cleaner/conditioner to the fretboard and bridge. Let it sit and soak in.
While the conditioner is soaking in is a good time to check your tuners. The collar bolts should be tight. Most string winders are the same size as these bolts. Don’t torque them down; they should be tight but not too tight.
You should also check the tension of the tuners to make sure they are similar. There’s a screw in the end of the tuner button. Use a screwdriver to adjust tension if necessary -again don’t overtighten. While you have the guitar on the bench, check the strap button screws as well.
After a while, wipe off any fretboard conditioner using your utility cloth. Any stubborn grime around the frets can usually be gently scrubbed with a soft bristle brush (I use a toothbrush). Reapply conditioner if needed.
Depending on the condition of the frets, this would the time to polish them if needed. This Fret Polishing kit has everything you need and instructions. Note: If you’re new to this you may wany to practice on a less-important guitar first.
Polish the body and headstock with polish cloth. If your guitar has a battery, this would be a good time to replace it.
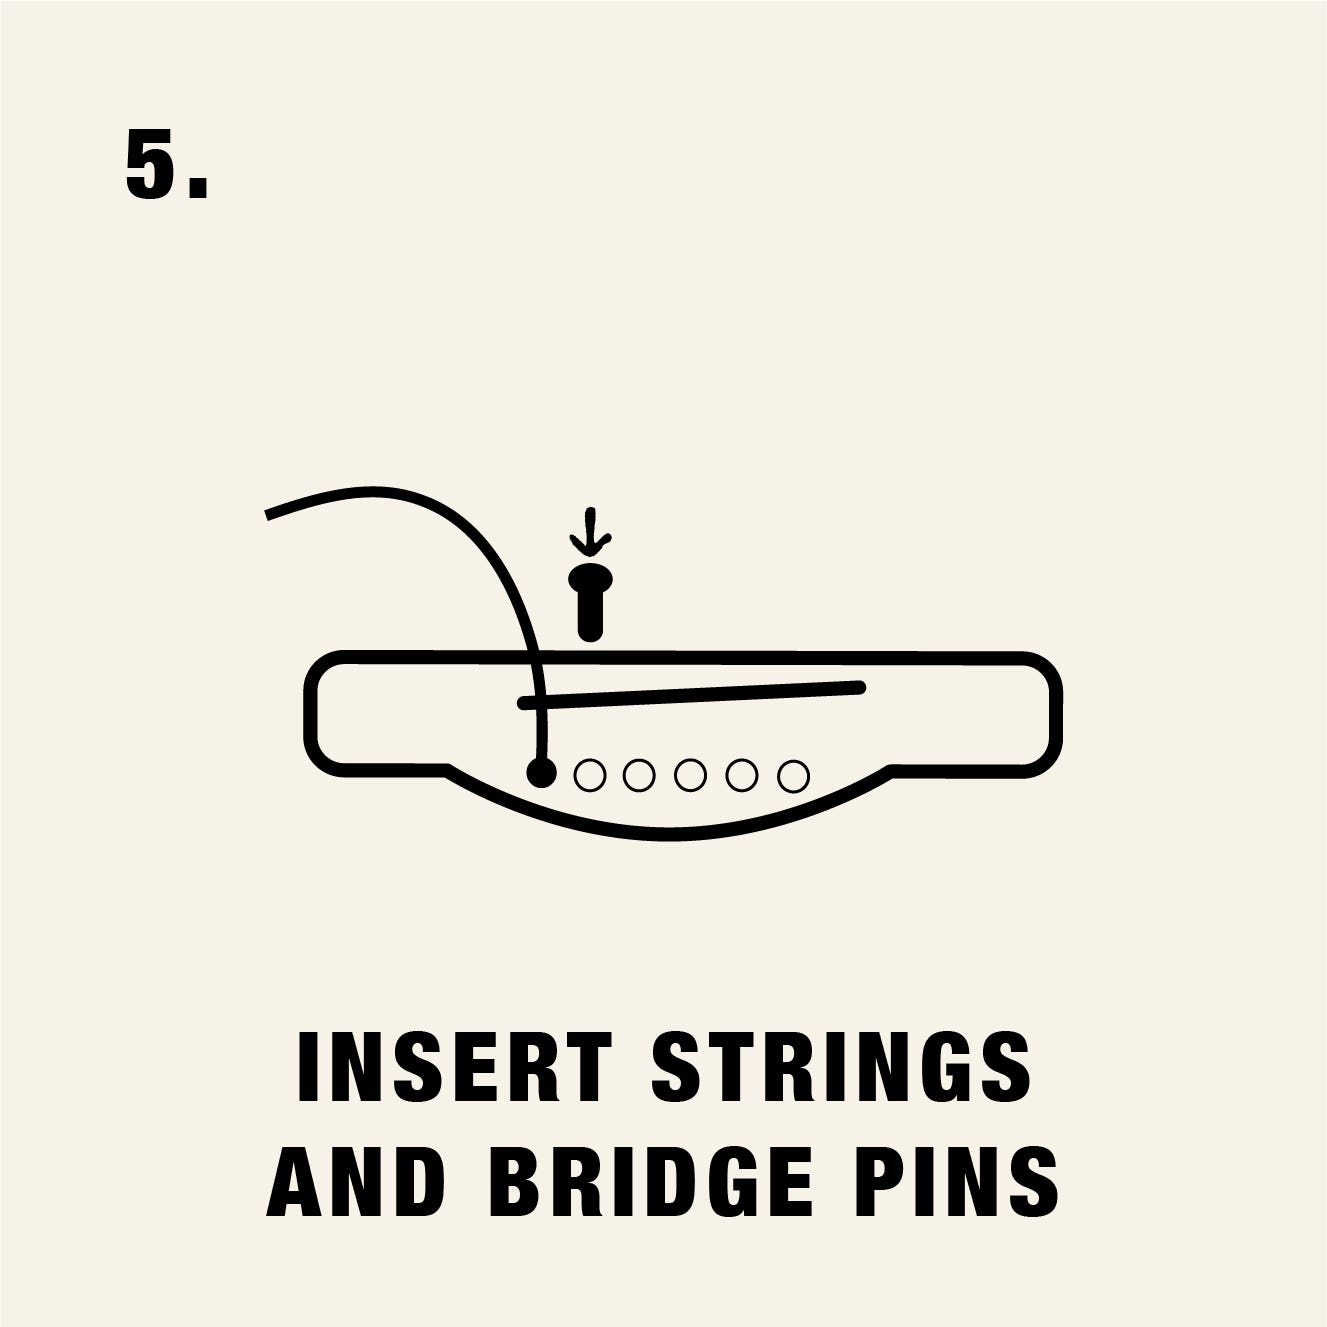
Step 5 – Insert strings and bridge pins
Open the string package and check that the set is complete. Use the bridge pin to push the ball end into each respective hole in the bridge. Check the sequence to make sure they are in the right order — especially the plain strings.
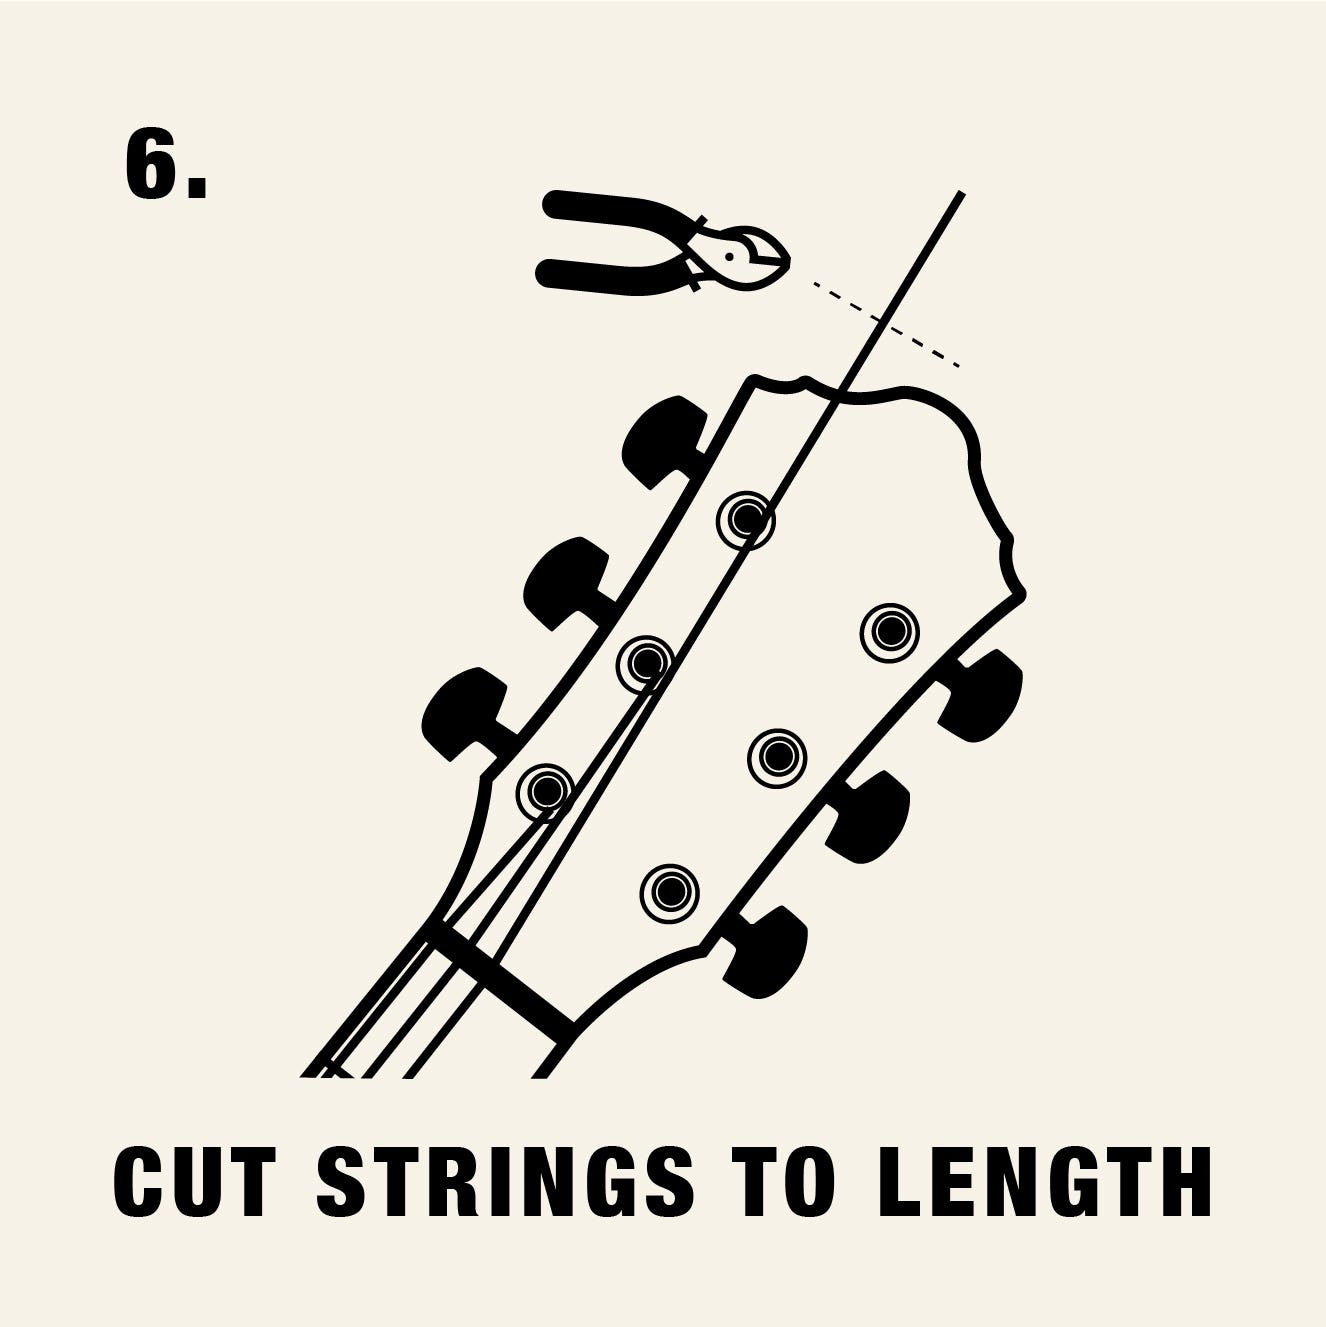
Step 6 – Cut strings to length
Pull each string to its respective tuner and use your wire cutter to cut each string two finger widths past the tuner. (about 1 ½ inches)

Step 7 – Wind strings around tuning pegs
Hold the string in the hole of the tuner with about 1/4 inch sticking out. Keep a little tension on the string with your right hand. Using your string winder, wind the tuner around and go above the cut off string when it comes around, then wind below it for the remainder of the winds, heading down the tuner shaft. You should have about three or four winds.
Pay attention to the direction. The strings should be like the petals of a flower, all flowing from the inside out. Make sure the strings come off the tuner and go inward to the center of the headstock and down to the nut.
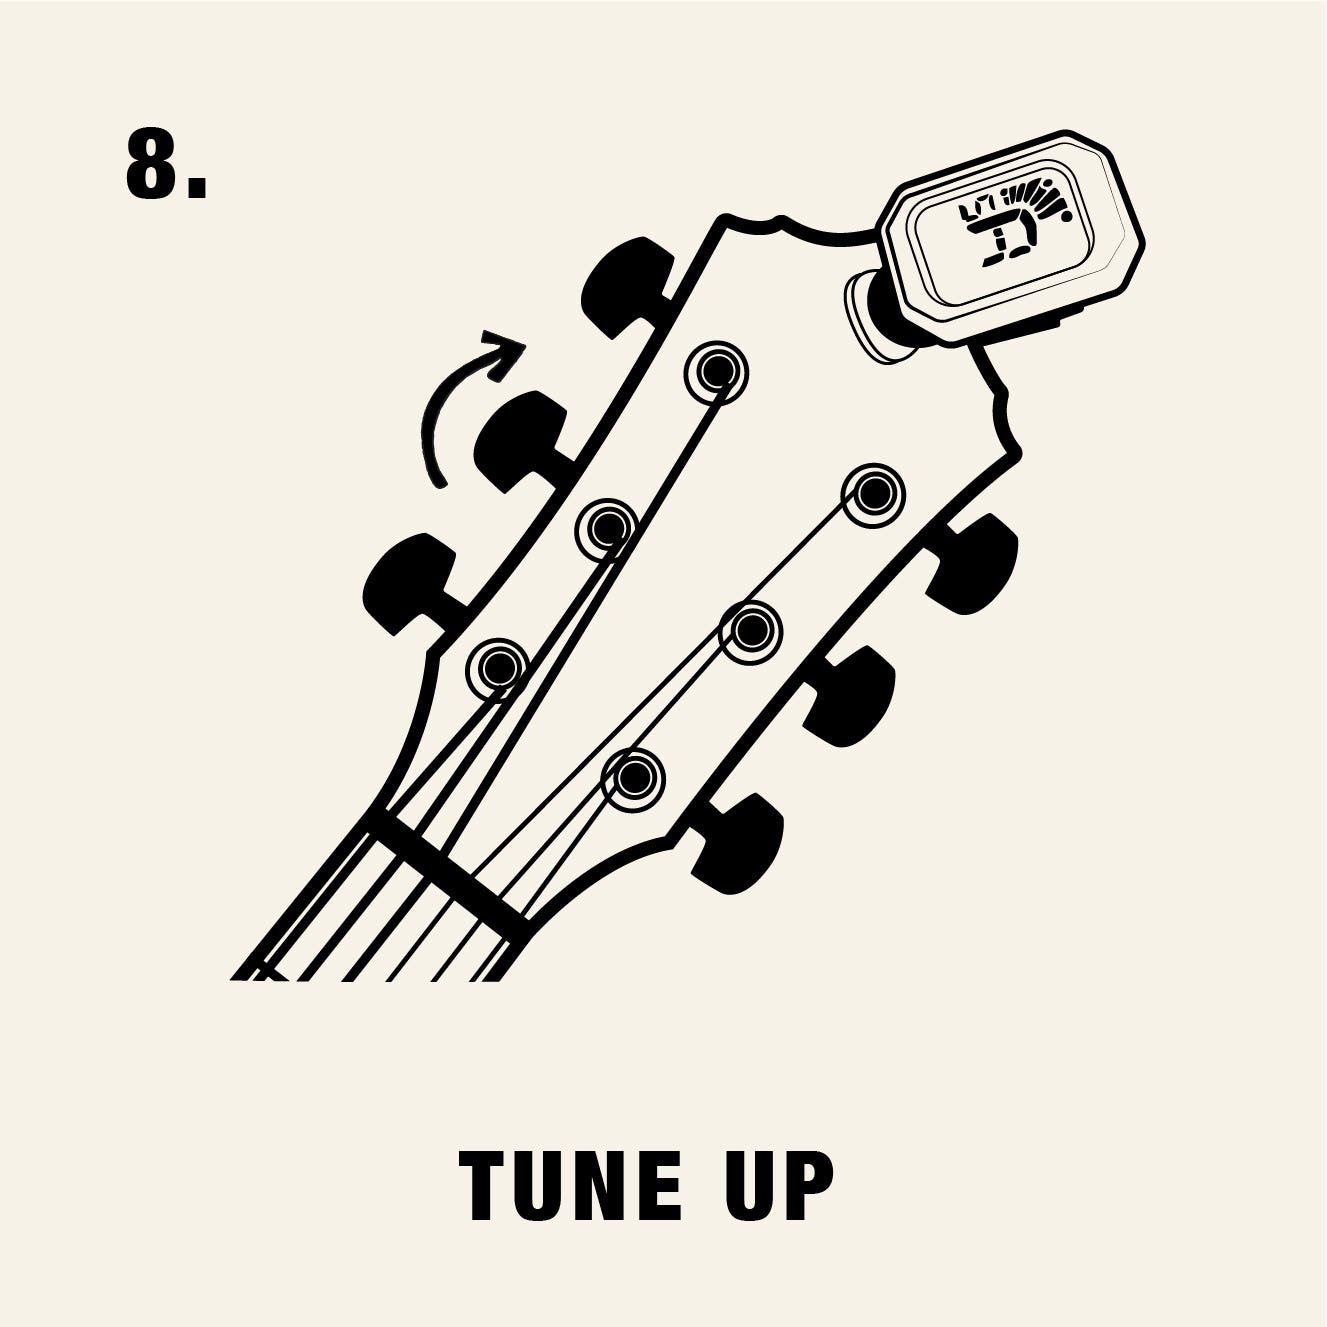
Step 8 – Tune up
Bring all the strings up to near pitch evenly. If you have a pickup, it is possible to unevenly compress the sensor under the saddle by bringing one string to pitch at a time, so load tension evenly.
When the bridge has even tension, push down on the bridge pin and pull up on each string to seat the bridge pin. Then use your tuner to bring all the strings to pitch, and you’re ready to play!
How Often Should You Change Acoustic Guitar Strings?
How often you need to restring depends a lot on how much you play. Everyone has different body chemistry, and some people are more acidic than others, causing faster wear. Coated string technology (like you find on Elixir Strings) can help extend the life of the string.
A quick method I use to determine if it’s time to change your strings is to run your finger up and down the high E string. If you feel any bumps at the fret positions, it’s ready for a fresh set. If you break a string, you should replace the whole set so you don’t have one brighter string.
Restring Theory
There are tons of alternate methods of winding the string onto the tuner, involving trying to “lock” the string on itself or tie it onto the tuner. In my experience, this causes all kinds of drama when you’re removing the strings later. I think this method works best, looks neat and tidy, and makes it easy to remove the strings when you’re ready for a fresh set.
Now that you know everything there is to know about restringing an acoustic guitar, it's time to get to work! Remember, take your time, be patient, and you'll have a fresh set of steel to sound your best in no time. If you have any questions about what kind of strings are best for your playing style, call the AMS Gear Experts at 800-458-4076. We'll be happy to walk you through the options and find you the perfect strings for your sound.