You just can’t shake the feeling… You want to create! Whether it’s writing music, starting a podcast, recording your favorite cover song with your friends, or streaming your favorite video games, the possibilities are there for the making.
It can be daunting to think about, I know. After all, the most popular creators have so much equipment and all sorts of fancy gear pieces that it seems like it’s out of reach for the rest of us, right?
Right?
Wrong.
It’s easier than you think to start recording at home. Sure, there are things to figure out along the way, but that’s what this article is all about. If you’re a beginner and the space you have available is at a premium, this is where you can start. We’ll discuss key items and necessities first, get you on your way, and leave room for the chance to expand — you know, as your desire to collect microphones grows. And it will; believe me.
Let’s get started, shall we?
Power Conditioners and Power Blocks
Before setting up and moving furniture, before you pick out your gear, and before you start to think up your full project studio, you need to think about power. It’s not the most exciting part of building a recording studio, but it’s important.
Look for outlets in your space that you can center your workstation around. There are two types of devices that work well in a smaller creative space: a rack power conditioner (which can sit on a tabletop or inside of a small rackmount gear case) and a power block (which in the everyday world is commonly often called a “power strip”).
While the standard consumer “power strip” you find in general big box retail stores may have a similar number of inputs in a similar form-factor (6-8 enclosed outlets connected to a corded plug that then connects into a wall outlet), the power blocks I am talking about here have a much more rugged enclosure, have a longer extension cord for easier deployment in a space, and have been designed to accommodate the safety needs of creative tools, studio electronics, and performance instruments.


With recording gear, you need a special layer of protection from surges and uneven power distribution that can come from older electrical systems and any interference that may be present.
In my opinion, you should have at least two power conditioners in some combination for your own setup. That way you can account for power to a computer or laptop, audio interface, and monitor speakers, as well as instruments and gear pieces like digital keyboards, guitar amps, pedalboards, and synths to name a few. And don’t forget consumer necessities like desk lamps, small fans, other office-style essentials — and of course a place to charge phones.
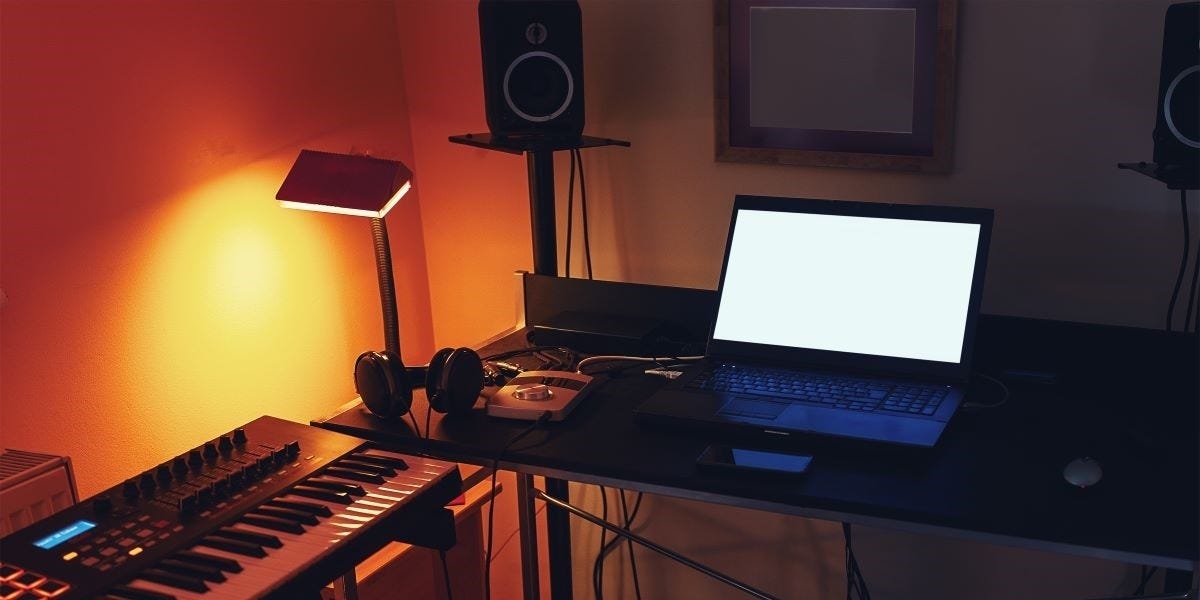
Table / Studio Furniture
Now that you’ve addressed the power situation. It’s time to set up a place to hold all your equipment and serve as your trusty home base for creation. A nice sturdy table or studio workstation will provide the foundation. Get your tape measure ready to see how much space you have, taking into consideration the need to leave room for doors opening and closing, accessing closets, built-in room pieces, and other furniture that’s also present.


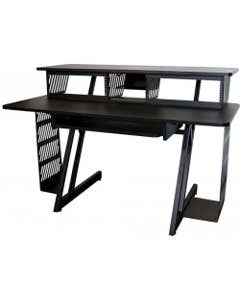
In a smaller room, it’s also important to take advantage of vertical space. There are great multi-tier pieces of studio furniture that allow you to position your computer monitor(s) and all your production equipment in ways that make them easily accessible, yet remain out of the way.
There are also separate small add-on tables and endcaps with built-in rackmount hardware that you can position to the side of your main table, so you can incorporate rack equipment, rack storage drawer systems, and rack platforms with ease. That will free up more space on your main table as well.
After all, home studio desks often need to double as traditional office spaces, study areas, and gaming setups, so being able to compartmentalize is a huge plus.
It’s important to know that electronic devices generate heat when in use, so when you set everything up, don’t push them completely up against a wall or 100% enclose them. You need to leave space to allow for heat to dissipate. Also, avoid setting up next to heating/cooling vents or up against baseboard heating if at all possible. This will help further regulate the temperature around your equipment. Excess heat can be a problem, and you can be extra safe by limiting external sources of heat in addition to the heat that’s generated during regular operation.
Audio Interface
The two most basic building blocks of a home studio are going to be your computer and an audio interface.
An audio interface serves as the dedicated link between software for music production and sound design. It’s the hardware most regularly used during live sound performances and recording. Think of it as a beefed-up and highly specialized version of your computer’s sound card, interpreting digital data more quickly and efficiently.
Interfaces come in all different sizes and feature sets. The primary consideration is the number of inputs and output sources.
The Scarlett series from Focusrite and the Quantum series from Fender are very popular choices for small project studios and have models that range from one or two standard recording inputs (XLR and 1/4"), all the way up to eight or more, plus additional digital connectivity options.
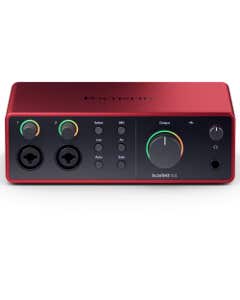
Focusrite Scarlett 4i4 Gen 4 USB Audio Interface
Special Price $299.99

Fender Quantum HD 8 26x30 USB-C Recording Interface
Special Price $999.99
Personally, I would go with a model that has four inputs or more, so you can record multiple vocal and instrument sources all at once. Even if you’re starting with just yourself, it’s better to plan ahead for what goals you have in the near future. Maybe your podcast or streaming idea expands beyond yourself to incorporate guests, maybe you want to record additional instruments or a second vocalist for your newest song, or maybe you want to have the ability to have, say… multiple amps or effects setups plugged into separate tracks, so you can switch between them. You want to have the capacity to explore those possibilities.
If you’re thinking about eventually recording drums with multiple mics, having the option to record a small band, or are planning to use a piece of equipment with a batch of outputs for separate isolated voices (like a sampler or drum machine), having a model with eight inputs is highly recommended.
Keyboard / Pad Controller
When composing and producing music using softsynths and sample libraries, a small keyboard controller is a must-have! You’ll be able to input lead melodies, chords, pads, and other soundscapes into music production software quickly as if you were playing the piano. Most smaller models are bus-powered, which means they are simply powered by a desktop or laptop computer through a USB cable connection.
Pad controllers have pressure-sensitive pads that can be used for a variety of purposes, including inputting drums, percussion, samples, and sound effects into your tracks. How hard you hit the pad will control parameters like attack, sustain, presence, and release, among many others. This “finger drumming” is a common technique for constructing beats and grooves with a more natural feel.
If you’re looking to do a bit of both, there are keyboard controller models that also include a bank of pad controls as well.


Native Instruments, Arturia, Akai, and Novation are a sample of the incredibly popular brands that make keyboard and pad controllers for project studios.
Personally, I use an Arturia Keystep-37, which clocks in at about around two feet wide and has a playable range of just under three octaves. It has transposing buttons (to extend range up and down), additional sequencing tools, a pitch bend control, and touch-sensitive modulation pad to help custom automate different parameters of a specific sound patch. It’s a wonderful little device that helps me during the composition process.
Headphones
When it comes to mixing and working on music compositions, a trusty pair of headphones is one of two important things you’ll need to balance your tracks and hear all aspects of your work. When you want to work late into the night or when you travel and take part of this setup with you, headphones are a necessity.
AMS has a wide selection of great monitoring headphones from all the big names! I love my price-friendly, durable, and reliable Sennheiser HD280s, and they have been sitting on my desk for years and years.


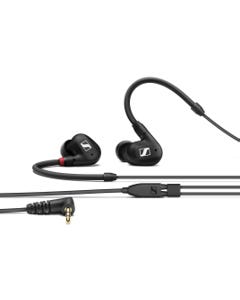
One last important thing to always remember when setting up your home studio: Always keep the headphone volume at a reasonable level, take time to relax your ears with regular breaks, and space out your sessions. Your ears are valuable, and you want to keep them protected and fresh!
A couple of important headphone-related accessories to also consider adding are a couple of 3.5mm-to-1/4” adapters (many interfaces and devices require a 1/4” headphone plug) and a headphone extender cable, which gives you extra distance to record in a different part of your recording space.
Studio Monitors
While mixing and listening strictly through your headphones is convenient, gives you the freedom to work without disturbing others, and a huge part of the overall process, I believe that it’s an important requirement to add a pair of studio monitors to your setup as well.
Studio monitor speakers are designed to hear your source audio without any additional colorization or the concessions in terms of audio quality. Mass-produced consumer speakers have to sacrifice some elements of quality and depth to account for miniaturization and convenience. Being able to switch between listening through your monitors and then go back to the headphones is a great way to see how your productions sound in different formats.


The Yamaha HS-series (I have a pair of HS8s and love them!) and the KRK Rokit lineup are powerful and popular, fitting the bill nicely and serving as fixtures of home studios everywhere. I would also highly recommend a pair of isolation pads for your monitors to rest on. This keeps them secure, eliminates buzzing sounds (which happens at louder volumes when you have them sitting on a hard surface) and limits high-pitched harmonics that could creep their way into the playback audio.
Cables
When you create, you’ll quickly find that musical instruments, microphones, pieces of electronic equipment, and consumer devices all require different cables, and that there are quite a few types to choose from.
For microphones, you’ll need XLR cables — five to ten feet in length for use at your desk, twenty-plus feet if you’re going to record sources in different parts of the room.
1/4" TRS cables go with keyboards, samplers, and drum machines, and are commonly used to connect models of monitor speakers to your audio interface. 3.5mm cables (which are found in headphones) are used with laptops, small synths, pocket beat machines, and devices like phones and tablets when paired with the proper USB adapter.
This is just a basic primer on cables, and if you’re looking for a more in-depth guide on cables, I’ve got your covered right here!
Time to Get Started – With Recording Gear from AMS
Building a recording studio is a multi-step process that can go as far as you ultimately see yourself going. This article represents the first step, helping to get started with a compact, comfortable setup for you to experiment, practice, and ultimately make the music and content you have been envisioning in your head.
American Musical Supply’s huge selection and 0% interest payment plans are just the thing for staying on budget and comfortably getting your studio dreams off and running. Thanks for letting us help you make music!

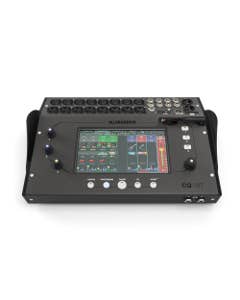
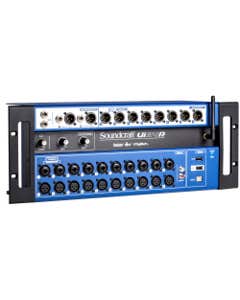
Allen And Heath CQ-18T Compact Desktop Wireless Digital Mixer
Special Price $1,199.99
Arturia V Collection 11 PRO Software - Download
Special Price $699.00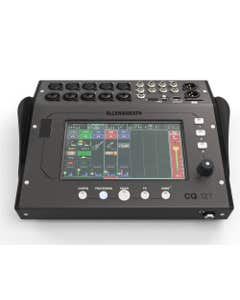
Allen And Heath CQ-12T Compact Desktop Wireless Digital Mixer
Special Price $899.99
Spectrasonics Omnisphere 3 Software Synthesizer
Special Price $479.00
Solid State Logic 18 26x28 32bit 192khz USB Audio Interface
Special Price $1,099.99
Beyerdynamic DT770PROX Closed Back Studio Headphones
Special Price $199.99